Showing posts with label wire. Show all posts

Friday, July 25, 2014

Personal Favorites & Catching up with Louise Goodchild

Some time ago, May 10, 2012 to be specific, I invited the very uniquely talented...


Louise Goodchild 

...to be a guest on this blog.   We displayed some of her pieces and thoroughly enjoyed her visit!  To see that blog post, click here:   "The Wearable Wire Art of Louise Goodchild Designs"


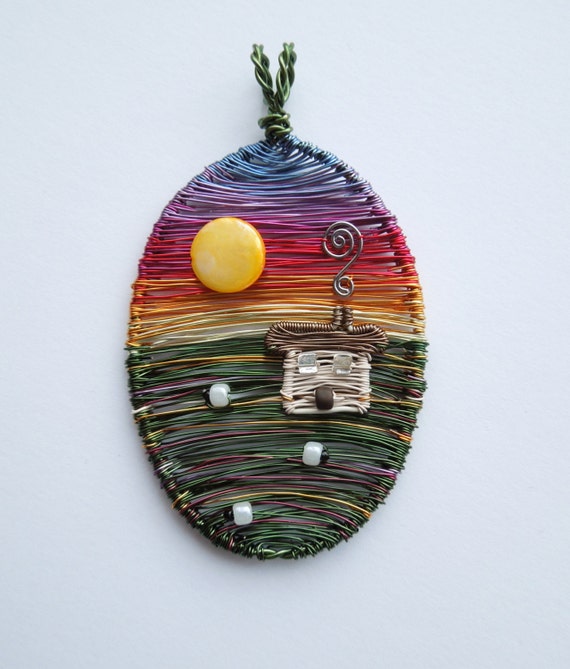
Moorland Sunset one of a kind designer wire pendant
"Moorland Sunset"
currently for sale at Louie's Etsy store.
(Note the sweet sheep by the cottage!)
Since then, I've continued to follow Louise's artful endeavors with her wire pendants and other creative jewelry and I always find them delightful!


She was recently asked which one was her favorite.   She replies in her blog with a brief history of her art and shows a few of the pendants that remain special to her. 
 Arrow comic down green
I encourage  you to visit that post:  

(I love that it includes a photo of the first wire pendant she made!)

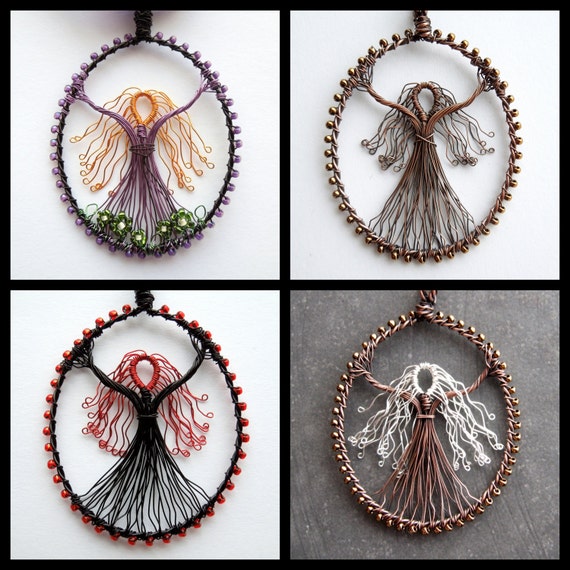
I have some additional favorites from Louise's work which include a series of custom-order  goddesses:


Custom wire goddess pendant unique design made to order

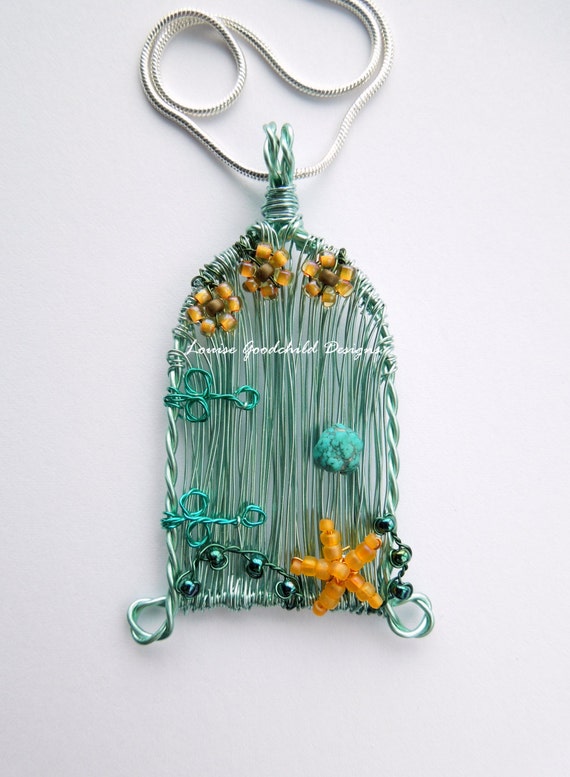
...as well has her fairy door series:


Seashore Fairy Door unique designer wire pendant

is currently available in her Etsy store!


I'm including a link to her blog, "Louise Goodchild:  Adventures in Wire,"  her Etsy store, Louise Goodchild Designs, and Facebook link so you can see more!

My thanks to Louise for continuing to delight us!

*****

The question Louise was asked has made me wonder... 

...what would each of YOU say is the favorite piece of jewelry, beads, (or other art) you've created!   I hope you will tell us about it or show us with a link to a photo in the comments section!   

Edit:  Think I'll add photos from your comments here so it's quicker/easier for all to see!   

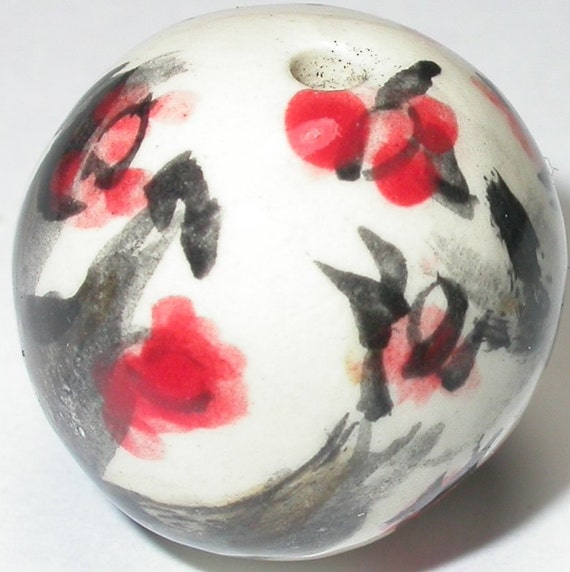
Chinese Brushstrokes Handpainted Porcelain BeadThis one is from 
Natalie Pappas. 
"This bead (which sold a long long time ago) is one of my favorites that I've ever made...

I had gone to a store with lots of Asian pottery and came home completely inspired and painted this bead. I have tried and failed many times trying to duplicate it."


******
Arrow comic down purple
I've been working on some new items that I think are my current favorites too.   I'll show you next time!  

Wishing you a happy day!

Sharyl

*****
Arrow comic down purple
Enjoy free shipping through Sunday, July 27, at Sharyl's Jewelry!


Sharyl's Jewelry on ArtFire

******
Images:

All wire-pendants on this page were made by Louise Goodchild.  Photographs by Louise used by permission here.

Sharyl's Jewelry components, photographs, and ad by Sharyl.  

Arrow:  http://www.wpclipart.com/signs_symbol/arrows/arrow_comic/index.html

Person wondering:   http://www.wpclipart.com/phps.php?q=question&submit=Search

******


Thursday, March 20, 2014

Introducing "Funky Flat Poly Beads!"

First of all, let me just say "Happy Spring!"   ...Finally!

I'll be showing you some new colors from my collection for Spring shortly, but first, (as my Dad used to say, I must "make a short story long!"   :-)

After playing around with buttons, stamps, cookie-type cutters, and molds as ways to form my polymer clay beads, I recently returned to the first tool I worked with... my hands.


I still love forming beads in all shapes


 and colors, 

...but have hit upon a very basic shape that I'm really loving to use in my designs, and I'm hoping some of you will too!   ("Think round,"... then let your mind wander a bit...)

They can be used in pairs for earrings or as spacer beads in "ethnic," "native," or "Boho" designs.  (I use some of these terms with a bit of trepidation, but hear them used a lot to describe jewelry designs.) Larger ones could be put together or stacked for a focal.   They can be used by the bunches in various sizes, all strung up.   If I say so myself, they look great with other polymer beads and pendants, but also with stones, ceramic, metals, and other mediums.  

Want to see what I'm excited about?!      

It's my "Funky Flat Poly Beads!"  


I know as soon as I say this, there will be umpteen people making these or who have made them in the past that I'm unaware of.  If so, I apologize and hope I've copied no one's idea.   At the same time, flat rondelle beads come in Czech glass, Greek Mykonos ceramic beads, stone, bone (which, sorry, I don't use), wood, metal, sea glass, etc.  I've always used a lot of flat spacer beads in my designs, which is probably what drew me to this shape.  So, hopefully, I'm just borrowing an old shape and tweaking it.  


The beads are hand-shaped so when you "think round," think "organic" rather than "cookie-cutter" round.   

Look for my coordinating beads, pendants, earring dangles, and headpins!


The first batch I've listed in my store are these bright-colored ones, some in solid colors, others variegated by mixing two colors by hand.  Basic colors are teal, lime, and hot pink!  

You can find these in the "Polymer Clay Beads and Buttons" section of my "Sharyl's Jewelry" store on Artfire.

I don't use a pasta maker at this point, I still do it by hand and with a rolling pin.   I make each one by hand, and it's much more time-consuming than many might expect.   The smaller the bead, the harder it is for me to make.


I have other groups I will list soon:  

  • Another batch in softer, more natural colors of variegated beige and white, yellow, and a pastel blue.   (Ready to go in the oven!)  I want to thank all who responded to my question in the Facebook Creative Bead Chat group regarding whether it was a necessity to seal polymer clay.  I was assured it was not.  I love the natural look of these!

  • I actually made this next set first.  They are painted with metallic paints and sealed for a raku look.   (These get baked again, so they require more time, all the way around, but I love the look.)

I have some pendants in similar colors and
finishes to list with these also!


I'm looking forward to getting more of these listed, along with the coordinating components, and I hope you are as excited as using them!    I will appreciate it if you help me spread the word about these!  

I will gladly consider requests for special orders, as well as any constructive suggestions you care to offer here!  For instance, I'd be very eager to hear:
  • Which colors do you like best here or which would you like to see offered?
  • There have been recent discussions about how people prefer to buy their lampwork beads.  I'm wonder the same about these.   Would you prefer larger groups, smaller sets, pairs?   Same size vs. various sizes?   Colors all the same or colors different in a set?

Thanks, as always, for being here, and sharing your ideas and comments for us all to learn from! 

A warm welcome to our newest members!   Now, let Spring begin!  

~Sharyl

 ****************


Monday, July 29, 2013

Art Bead Scene July 2013 Monthly Challenge Reveal: Olga in Armchair


Portrait of Olga in the Armchair, 1917
Pablo Picasso
Oil on Canvas 130 × 88.8 cm
(Please note this art is copyrighted and is to be used only as inspiration.)


For this month's Art Bead Scene challenge, 
I wanted to design with the colors 
found in Picasso's painting of Olga, 
incorporating some of the lines and shapes, 
more than specific objects, such as the flowers 
(although that was tempting too!)

I focused on the dark green,
the grayish blue, the faded pink, and the amber.


Design, wirework, and clasp by me (Sharyl McMillian-Nelson).
Art beads by Natalie Pappas and Serena Thomas.


Handmade pottery focal bead by Natalie Pappas, NKP Designs.
The lines on the bead remind me of the folds in the dress fabric of the art piece. 
 The color is also similar to the fabric.
This long focal dangle also is reminiscent of the climbing flower vine 
on the chair in which Olga sits.


The copper-plated leaf component was purchased, but I added a coat of black patina to it to darken and better go with the lines in Natalie's bead.
It echos the lines and shape of the leaves in the vine design found on the chair.


I used a copper headpin to wire wrap this handmade lampwork spacer bead
 by Serena Thomas of Serena's Beadery, aka Taneres to this copper filigree metal.


More beads from the colors of flowers and vines represented in the painting:  
muted grayish greens and blues, pink, and amber.
Along with several types of stone and copper beads,
are transparent amber and gray lampwork spacer beads  

from  Serena's Beadery.


The front and side parts of the necklace are linked with large copper hoops
 and a small bit of soldered copper chain.


The beads that make up the sides and back of the necklace 
are Dragons Blood Jasper in deep red and forest green 
with accent beads of copper and African Turquoise Jasper rondelles.
I handmade a simple copper hook for a back fastener.


There will be an ABS BLOG TOUR HERE
on Wed., July 31.
Just click the link above on that day to get the guided tour!

Thanks for stopping by!   Your comments are always welcome! 

Special thanks to ABS and to bead artists, Natalie and Serena, for their inspiring beads!

~Sharyl

* * * * * * * * * * * * * * * * * * * * * * * * *
For those participants in the upcoming blog hop, below is the final list you can paste into your entries.  It has not changed from the one sent the last time.  Many thanks!  ~Sharyl

Blog Hop Participant List:


Sharyl McMillian-Nelson     Sharyl’s Jewelry    (Host)

Kashmira Patel   .....    Sadafulee...always in bloom! 

Lisa Lodge   .....   A Grateful Artist - Pine Ridge Treasures 

Tanty Sri Hartanti   ....   TJewellicious by Tanti      


Kathy Lindemer ....  Bay Moon Design    

Laren Dee Barton ... Laren Dee Designs      

Melissa Trudinger  ... Beadrecipes    

* * * * * * * * * * * * * * * * * * * * * * * * *

Wednesday, May 15, 2013

The "Non-Reveal" Post


Some of you may be wondering what I'm up to these days.  Others of you already have some idea.   It's probably obvious I'm not producing new items at the rate I should be, so I'll explain a little, I just can't show you photos yet...


Often I'm in challenges and post a "reveal" page at the end of the challenge to show what I've made.   Until that time, development on the project is typically kept quiet so the results will be a surprise to all involved.   Those of you who have been involved in challenges, or have read about them, know what I mean.   The same is true of publishing.  Most magazines stipulate that there will be no public showing of your jewelry until after it has been published by the magazine that has accepted it for publication.   

I'm not sure how each of you feel about sharing custom order work you are doing for customers, but I follow a  strict code of privacy here as well.     Perhaps that comes in part from my library background where patron confidentiality is paramount.    Perhaps it comes in part from following too many royal weddings and hearing how no one knows who the royal dressmaker will be or what the bride's dress will look like!   ha!


Regardless, I don't share photographs of a custom order I'm working on, until the customer and I mutually agree on a time I may share it with others.  I typically don't ask until I feel the time is appropriate.   If that sounds stricter than necessary, it may be, but that's just the way I work.

Now, none of this was meant to be a lecture, or to say one way is better than another, it's just background for my story to explain what I've been working on...and will continue to work on for a few more weeks!     I've decided to share a little of the news now, because I've finally hit a milestone today!  Yippee!

The truth is, a close family member who is very dear to me is getting married near the end of June.     I'm making the jewelry for her and her wedding party!   I've mentioned this vaguely to some of you a few times, but not discussed in any detail on my blog until now.    As the time draws nearer, I'll tell you a little more about the project, lessons I've learned,  and may have a few questions for you too!   

When I began working on this many months ago, I thought, "I design jewelry, I have plenty of lead time, I can do this!   No problem!"    I spent several months just planning, designing, and ordering supplies.    Well, turns out I had some things to learn and to figure out.    I've redesigned and reordered materials several times since!      Everything has finally been planned, ordered, and has arrived!

Here are the jewelry pieces I'll be providing for this event:

Bride:
  • necklace
  • bracelet
  • earrings


Bridesmaids:   (7 )
  • necklaces   (8 done!  X)
  • bracelets   (7 done!  X)
  • earrings
  • gifts for rehearsal


In addition, I'm making a "backup" necklace for both the bride and a bridesmaid and an extra pair of earrings for "just in case" last minute disasters.   AND I'll be taking my pliers to the wedding!    (There have been some jokes floating about regarding me wearing a tool belt to the wedding with my dress!)   ;-)

I started "production" with the 7 bridesmaid's bracelets.  And today, finished the last of the bridesmaids' necklaces, all 8 of them  (7 + a spare).   This has been the most worrisome part for me, and the part with the most repetition--also difficult for me.  (You know I'm a one-of-a-kind designer... so this held its own challenges!)      I feel like the hardest part is over though, and I'm on my way now!   

Hopefully, I'll be able to show you photos when the wedding is over, but for now, my bride is getting the "royal treatment!"   ;-)


What a learning-growing experience this has been and so worth every minute!   Thank goodness I have such a delightful, cooperative, go-with-the-flow, lovely young woman to work with.   As usual, I've learned so much I never even dreamed I would need to know.   

I'm so honored to be involved in her wedding in this way and hope that the jewelry turns out just the way she would like it.   She deserves the very best!

Thanks to all of you who have wished me good luck and offered support.   When I finish in a couple of weeks, I'll celebrate, then get back to business as usual.  Best wishes to all of you in this happy season of weddings and Spring!


~Sharyl

-------------------------

Image Credits:


-------------------------

Sunday, May 5, 2013

1 question survey + tip about Monday's special event!

I have a quick survey for you  today!   I would greatly appreciate your feedback.   I'm starting to do some paid marketing and trying to decide how/where my time and money are best spent.  You can help me with your input!    (There is only one question and it's multiple choice, so it's really quick!)

Click here to take survey 

If you have any comments from your own experiences about marketing and paid advertisements, please send me a note or include in the comment section.  I'll be very grateful!

Also, please check in tomorrow!   I was one of the "5x5 Tester Group" in the May 2013 issue of Artisan Whimsy Bead Chat Magazine  and the results have been published!  (Pages 21-26 if you want a sneak peak!)  You can click below...


I'll show you more details on how the metal pieces arrived, what I did to them, and used them in my designs!   We all had a great time, and hope you will enjoy our mini blog hop Monday!

I'll give away one of the pieces to one of our blog participants, so come back for details!
-----------------------------------

Graphic Credits:

http://www.wpclipart.com/signs_symbol/checkmarks/checkmarks_3/.cache/checkbox_checked.png

http://www.wpclipart.com/education/kids/students/.cache/student_writing.png

Bead Chat magazine copyrighted by Melinda Orr. 2013
----------------------------------------


Friday, March 8, 2013

"Sand and Sea Blog Hop" Reveal!

Lisa Lodge, from the blog,  "A Grateful Artist"  and store, "Pine Ridge Treasures" on Zibbet, is hosting:


I'm so excited to be a part of it!

For this event, Lisa sent me a bag full of interesting beads in "sand shades," (brown, copper, and tan tones).  Even though the event was several months away at the time, I couldn't resist dumping them out on the table as soon as they arrived to see what was there!   I planned to put them right back into the bag for a bit, but couldn't wait 5 minutes to begin sorting them and planning what I would do!


These were the ones I first sorted from the larger bag
as inspiration for my design.
I used a good portion of the other beads too,
but these were the ones I designed around.

As recommended in the guidelines,
I did not purchase anything new for my creation.

I only added a few beads I already had:
A handmade-button the color of sand 
with a wonderful wavy pattern from
 Linda Belinda on Etsy.
Mykonos Greek beads from
 Linden Avenue Designs on Etsy.

These, a sprinkling of pale blue glass beads, 
and a few hardware store washers I had on hand,
were the only items I added from my collection.  I made my own clasp from copper wire.


Even though my color was "sand," I couldn't resist adding a tiny bit of blue for water.   (I got the idea from a couple of the crystals Lisa included in my bag that were brown with a bluish finish.)  

As we all know, sand can come in many shades, and you can see some of the variety in the beads Lisa sent and in the button I added.  


I just loved the rectangular coral-color bead.  The white swirl beads and long slender bead reminded me of both waves and the most beautiful white sandy beaches!


This irregular shaped bead I found in the bag
was a real favorite too.
It looks like stone to me,
but I suppose it could be some type of clay bead.

I've never been able to wrap a briolette to my satisfaction,
but was determined to use this one from Lisa
as part of the focal dangle!
Luckily, the wire work on this piece
is not "fussy" or "perfect." 
It's "relaxed beach style!" 


Lisa also sent some thin wire sort of a
 burnt orange color.  
 I couldn't imagine what I would do with it
until I was nearly finished.  
 I ended up twisting it around some lose beading wire
in several areas, and I really liked 
the bit of color it added in those spots!  
The wire took me from "goof" to "accent" in no time at all!  
I think I'll need to buy some of this for future designs!


Thank you for visiting my page! 

Please take a look at the others who are participating:


ELEANOR BURIAN-MOHR, THE CHARMED LIFE

MARY GOVAARS, MLH JEWELRY DESIGNS

TANYA GOODWIN, A WORK IN PROGRESS

KATHY LINDEMER, BAY MOON DESIGN

TOLTEC JEWELS, JEWEL SCHOOL FRIENDS


SHARYL MCMILLIAN-NELSON, SHARYL'S JEWELRY     <---YOu are here!

MARLA GIBSON, SPICE BOX DESIGNS

MELISSA TRUDINGER, BEAD RECIPES

DOT LEWALLEN, SPEEDIE BEADIE

EMA KILROY, EMA K DESIGNS


KIM BOOTH, THE PINK MARTINI BOUTIQUE

JAMI SHIPP, CELEBRATING LIFE

LEAH TEES, MY BEADY LITTLEEYES

CHRISTIE MURROW, CHARIS DESIGNS JEWELRY

MONIQUE URQUHART, A HALF BAKED NOTION


GLORIA ALLEN, GLORIA ALLEN DESIGNS

CINDY ANDERSON WILSON, IT'S MY SEA OF DREAMS

SUZI CAMPBELL, SUZI CAMPBELL CREATIONS

SHAIHA WILLIAMS, SHAIHA'S RAMBLINGS

ANNETTE RIVERS, MAMA OWL'S MESS


A special thanks to Lisa for organizing
and hosting this event! 
If you have any trouble linking to the participant sites,

~Sharyl


* * * * * * * * * * * * * * * *


Saturday, March 2, 2013

Making Findings... A not quite "how to"

I didn't start out to create a tutorial on making wire findings.   I was just making some copper clasps, hammer-hardening as I always did, then realized I had quite a few this time, so I'd give the tumbler a try.  

Those are the tumbler barrels setting in the red device
 which spins them.  
 The small machine which just happens to be 
sitting in front of it is a grinder.

I bought the tumbler last year, used it once or twice, then parked it on my work bench.   Since I typically only made a couple of things at a time, hammer hardening seemed to work fine and took much less time.   

Now that I've said that, I may not make another piece without running it through the tumbler too!    


I should have been taking photos at every step, but didn't really get the idea until I saw how shiny, clean, and beautiful the pieces looked when they came out of the tumbler!   All sharp edges and tool marks were smoothed without all the time spent filing and buffing.   I just set the tumbler up with the stainless steel shot (small bits of stainless steel in a variety of shapes), just  enough water to cover the shot, and a drop or two of of "Shine Bright" cleaner.  I turned the machine on, shut the door to the room, (it's a wee bit noisy),  and went to bed. 


The next day I turned off the tumbler, used the strainer to dump the stainless steel shot and wire items out of the barrel  without loosing any bits, and rinsed it all well.   


The bright copper was so beautiful, 
I hated to do anything more to the pieces!


But alas, "antiqued" metals are more popular now,
so I used Liver of Sulfur to darken the clasps.
(For more detailed instructions on how to use
 this method to darken copper,
please see my entry on Artisan Whimsy.)

One of the clasps in use.


So far, I'm just keeping up with my own demand, but I may put a few in my store.   
  • Would anyone be interested in that or do you make your own?   
  • Do you prefer bright or antiqued copper, bright or antiqued silver, or bright or antiqued brass?

Hope your own work is going well!   Please tell us what you are up to of late!   

Warm wishes  ...(because I'm tired of this cold winter)!

Sharyl

P.S.  March has arrived and I'm beginning to load Celtic and green jewelry into my Sharyl's Jewelry ArtFire store!  This is one of my favorite inspirations!

********************************