Showing posts with label pendants. Show all posts

Friday, July 25, 2014

Personal Favorites & Catching up with Louise Goodchild

Some time ago, May 10, 2012 to be specific, I invited the very uniquely talented...


Louise Goodchild 

...to be a guest on this blog.   We displayed some of her pieces and thoroughly enjoyed her visit!  To see that blog post, click here:   "The Wearable Wire Art of Louise Goodchild Designs"


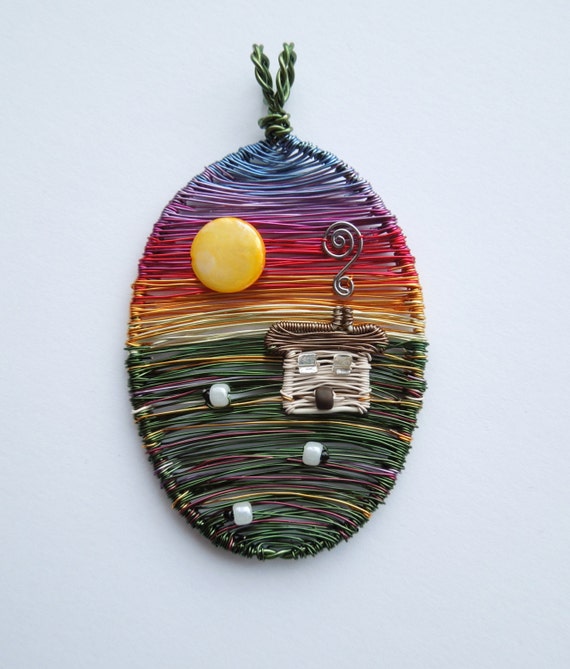
Moorland Sunset one of a kind designer wire pendant
"Moorland Sunset"
currently for sale at Louie's Etsy store.
(Note the sweet sheep by the cottage!)
Since then, I've continued to follow Louise's artful endeavors with her wire pendants and other creative jewelry and I always find them delightful!


She was recently asked which one was her favorite.   She replies in her blog with a brief history of her art and shows a few of the pendants that remain special to her. 
 Arrow comic down green
I encourage  you to visit that post:  

(I love that it includes a photo of the first wire pendant she made!)

I have some additional favorites from Louise's work which include a series of custom-order  goddesses:
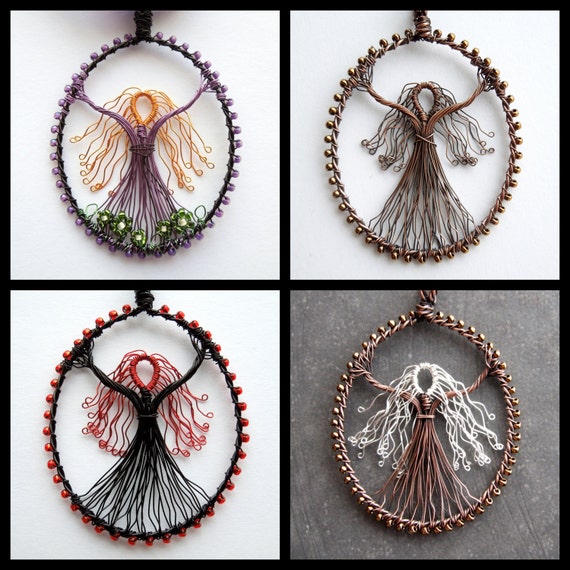

Custom wire goddess pendant unique design made to order

...as well has her fairy door series:
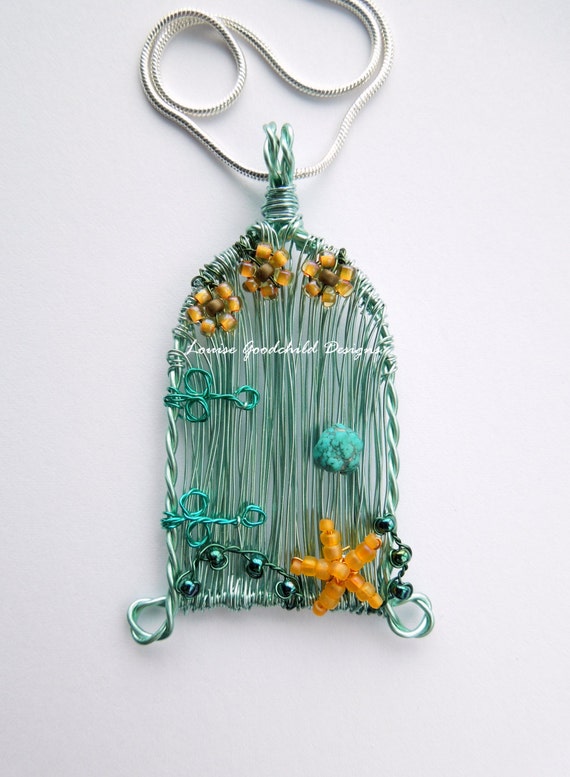

Seashore Fairy Door unique designer wire pendant

is currently available in her Etsy store!


I'm including a link to her blog, "Louise Goodchild:  Adventures in Wire,"  her Etsy store, Louise Goodchild Designs, and Facebook link so you can see more!

My thanks to Louise for continuing to delight us!

*****

The question Louise was asked has made me wonder... 

...what would each of YOU say is the favorite piece of jewelry, beads, (or other art) you've created!   I hope you will tell us about it or show us with a link to a photo in the comments section!   

Edit:  Think I'll add photos from your comments here so it's quicker/easier for all to see!   
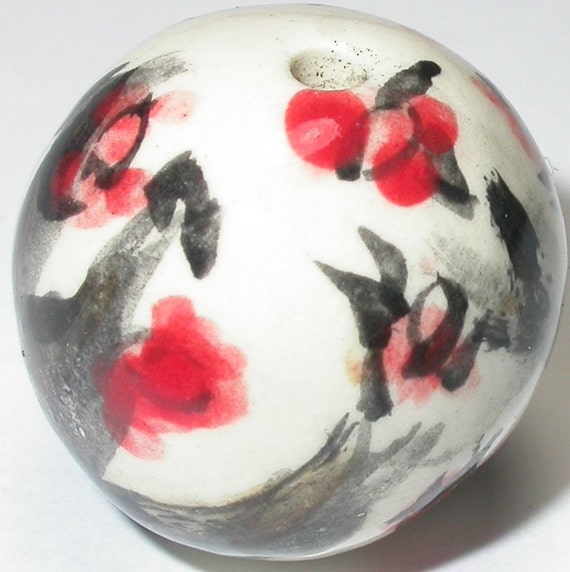
Chinese Brushstrokes Handpainted Porcelain BeadThis one is from 
Natalie Pappas. 
"This bead (which sold a long long time ago) is one of my favorites that I've ever made...

I had gone to a store with lots of Asian pottery and came home completely inspired and painted this bead. I have tried and failed many times trying to duplicate it."


******
Arrow comic down purple
I've been working on some new items that I think are my current favorites too.   I'll show you next time!  

Wishing you a happy day!

Sharyl

*****
Arrow comic down purple
Enjoy free shipping through Sunday, July 27, at Sharyl's Jewelry!


Sharyl's Jewelry on ArtFire

******
Images:

All wire-pendants on this page were made by Louise Goodchild.  Photographs by Louise used by permission here.

Sharyl's Jewelry components, photographs, and ad by Sharyl.  

Arrow:  http://www.wpclipart.com/signs_symbol/arrows/arrow_comic/index.html

Person wondering:   http://www.wpclipart.com/phps.php?q=question&submit=Search

******


Saturday, April 26, 2014

Pearls, Polymer, and the April Art Bead Scene Challenge!

Do you remember this "sneak peak" from my last blog post?   This will be the last of 3 items I made using glass pearls from Lisa Lodge's "Spring Pearl Challenge!"


The art from this month's Art Bead Scene challenge ...


Swaying Dancer (Dancer in Green), 1877-79
by Edgar Degas


...in particular, the dancer with black hair and her costume, inspired my polymer clay pendant for this piece.


I made the pendant from polymer clay 
and used a square rubber stamp I have. 
Then I cut it in an oval shape with a small
cookie-cutter type device.
I painted the center black
to match the dancer's hair
and the petals to match the dancer's costume--
 aqua acrylic paint (though it looks more blue here)
with copper mica powder on the edges.


Above the pendant are two lampwork beads
that remind me of the aqua color and shapes in the painting.
The rounded blue bead and
the green bicone bead are lampwork by EricaBeads.
There are also two sage-gray lampwork spacer beads just above those
in the bead strand.  Those were made by 
Serena Thomas of Taneres on Etsy.


You can get a glimpse of the green glass pearls here.
 I also used some of the synthetic sea glass Lisa Lodge sells.
There are blue and green Czech glass cathedral beads I purchased from MayaHoney.
Some of my "Funky Flat Poly Beads,"
bronze-looking glass seed beads, and more are also in this mix!
I also added a bit of multi-color (blue, aqua, brown)
hand-dyed silk ribbon with glitter edges
from Abby&Ellie as a nod to the swirl the ballerina skirts.

Handmade clasp by me.
I love these little bead caps, again reminiscent of the ballerina skirts.


Full view!


See other entries on the ABS Flickr page!  

Thank you to Art Bead Scene, Lisa Lodge, and the artists whose hand-make art beads were used in this necklace!  It's so nice when opportunities collide and something fun comes of it!  

Continued happy Spring to all!

Sharyl
**********************


Sunday, April 13, 2014

Tanya Goodwin's "Shibori Ribbon Blog Hop Challenge" Reveal!

Ever heard of "Shibori Ribbon?"  I confess I hadn't until I saw Tanya Goodwin's post that she was hosting a blog hop featuring it!  Well, Tanya is my friend and "almost-neighbor" (and a wonderful jewelry designer), so I had to check out what this mystery ribbon was all about! 
  

And boy, is it yummy stuff!  There are several people on Etsy who sell it, and I purchased mine at AriaDesignStudio.  My ribbon like others though had its start at ShiboriGirlStudios!   It's beautiful pleated silk ribbon that comes in an amazing array of colors!

I knew immediately I had to join this blog hop, obtain some of this luxurious ribbon (although Tanya graciously gave away pieces too), and try this out!  

I quickly came up with an idea.  I had recently made a polymer clay pendant in metallic blue, purple, gold, and pink. 


I used a "sunflower" stamp,
state flower of Kansas,
but not the classic yellow and brown colors!
The pendant is dark blue polymer clay,
topped with metallic acrylic paints
and mica powders.  Then sealed.

The lines in the flower petals reminded me of the folds in the Shibori ribbon, so I went in search of ribbon to match my pendant.


And I found my perfect dream color!
It amazing how "rich" looking this ribbon is.
The color in the folds is different than outside the fold,
adding depth and texture to the look!

Luckily, I already had copper clamps from a previous project and these worked wonderfully with the ribbon.  I made a copper clasp and added a bit of chain to the back of the piece.

My design was simple and that's the way I planned it.  But it was "too" simple.  I wanted to make it asymmetrical (yes, I keep trying)!  

I made it so there was more ribbon on one side, then added the clasp and a fun mood-bead to the lower side.


In the front, I decided to make a small copper bail with purple patina, then found I already had one made! What luck was that?!


"Yes," I thought, "this will work nicely!"


Then, before I could call it quits, I decided to add a few of my colorful metallic "Funky Flat Poly Beads" to the focal!
More of these colors coming to the store soon!


The beads connect the copper/purple bail
and the polymer clay sunflower pendant.


Now before I show the entire piece, I have to share with you this bracelet I had just made. It too reminded me of the folds in the ribbon and the color seemed just right!


Altered Brass Bracelet in Violet and Gold


The finished pieces.

I'm anxious to see what the others do with Shibori Silk Ribbon.  I'm not sure my use as a chain-substitute was as inspired as it might have been, but it feels so soft against the neck and I love the colors I was working with here!   


I still have another strip of ribbon, so we'll see what else I can dream up!

In the meantime, please let's go visit the other participants and see their creations!   My thanks to Tanya Goodwin for hosting this event and introducing me to Shibori ribbon!


Tanya Goodwin (host) "A Work in Progress"

Maryanne
Alenka
Monique
Carolyn
Mary
Catherine

Christine
Sharyl      <---  (You are here!)
Therese


Thanks and see you next time!  --Sharyl

****************

Monday, December 16, 2013

Playing with Polymer Clay!

Recent polymer pendant I made.

Between holidays, giveaways, and sales... challenges and blog hops... special events (mine and others)...,  it seems like FOREVER since I've just written a blog entry about jewelry-making, pure and simple.  Well, I have so many blog topics to catch up on, it may take me a while, but today, I thought I'd bring you up-to-date on what I've been doing with POLYMER CLAY.
   
Some of my metal bails, recently sent to the
 Emporium of Impossible Things in Canada.

Yes, I know, METALS were my thing!   And yes, they still are!  But I started experimenting with polymer, not really expecting to like it much.  (It's like PLASTIC, for heaven's sake, and that still bugs me!)  But I confess, I'm rather hooked!   

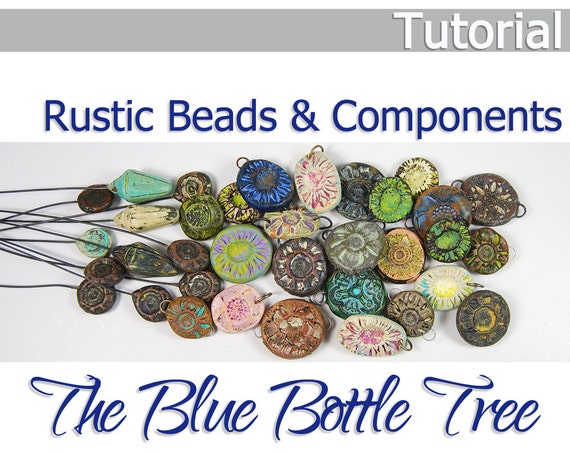
It all started when I read on Facebook about people making some wonderful looking beads and indicating they had used a tutorial by Ginger Davis Allman  of "The Blue Bottle Tree" on Etsy.

Tutorial Rustic Beads and Components from Polymer Clay Project Fimo- Boho Distressed


Tutorial Rustic Beads and Components from Polymer Clay Project Fimo- Boho Distressed

For some reason, I never thought I liked polymer clay beads until I saw these.  These looked like pottery to me.   They were "my style!"  And I loved them!   So I bought the tutorial and gave it a try.   
A bead from the first batch. 


Like everything I do though, I want to skip from beginner to expert mode in a flash and skip all the stuff that comes in-between. Instead, it seems like a long, hard road, with plenty of "flops." Isn't that just the way with learning any new skill or art though?  

IN THE BEGINNING: 
WONKY BEADS 

Sometimes, I can't decide if the pieces are really flops or just not my style.   I may like the colors, but not the shapes.  Or the shapes, but not the color.   


These are some of the first pendants I made.  I find them terribly "wonky" and I'll say so right out.  One brave soul suggested I might try making these a bit thinner, and that made a world of difference.  Thanks for that tip!  My thicknesses were not all all even either, and I'm learning to regulate the thickness of the clay a little better since I started, but still struggle.  

I used to have a terrible time trying to move the piece from my work surface to my baking surface, and finally read that the way around that was to put a bit of parchment paper down when preparing the bead, then transfer the bead, paper and all, to the baking pan.   (That was a "palm on forehead" moment!)

MOVING ALONG: 

WINTER HOLIDAY: 

My fun with polymer coincided nicely with the holidays!  I started making "sugar cookie" ornaments...


These all went into the WINTER HOLIDAY JEWELRY & ORNAMENTS section!
There are more!  Check them out!


I started a "Polymer Clay Beads" section for beads and pendants.   Some were holiday-themed.  Others not.


PRACTICE MAKES... BETTER?

Now that I'm hooked, I'm reading books and finding inspiration for polymer clay everywhere!  There are so many wonderful artists among us using this medium, and I just never noticed what they were using!   I'm in awe of them!

I'm trying a few slightly more advanced techniques, blending clay colors, making designs in the clay before baking, adding texture, expanding color options.   I'm starting to like what I see a bit more, but know I have so far to travel yet!


LATEST WORKS:
MIXING MY LOVES!

My most recent concept is to combine my metal work and polymer clay.  This purple was one of my first two pieces. 


Once I knew it would work, I tried more! 


You'll find these in a section called "Mixed Polymer and Metal"


AND NOW:   TIME FOR A SALE!

Well, as you can imagine,
several months and many pieces later, 
I've collected so many beads and ornaments,
my store is full to the brim!

What a good time to have... 

A SUPER POLYMER CLAY SALE!


Use coupon code SUPERPOLY to get 40% OFF in these sections:
These will appear at regular price with a "COUPON" flag in the bottom right corner of the item photo.  The discount will appear at checkout when you enter the coupon code.

Please Note:  Reduction on polymer ornaments in the "HOLIDAY" section have already been taken. The price you see is the 40% off sale price.  No code needed.  They will have a "SALE" flag in the bottom right corner of the item photo.  

Thanks for taking a look!    

* * * * * * * * * * 

Wonder where I'll head next?!  


--Do YOU work with polymer clay?   --Would you like to?   Leave us a comment!   --Link us to a photo of your work...or your store!   --If you have helpful suggestions or comments, please leave those too!  


 --If not, tell us what you ARE exploring these days!  We'd love to hear that also! 

 Thanks and Happy Holidays!
~Sharyl
 * * * * * * * * *

Tuesday, September 17, 2013

Patina Sunset Challenge

Melinda Orr, ORRTEC, got me interested in metal work and patinas nearly a year ago now and I'm loving this aspect of jewelry making!   (Melinda is also the founder of the Facebook group, Creative Bead Chat, and the online community, Artisan Whimsy.  AW is currently hosting the Patina Sunset Challenge.  ) 

AW October Challenge: 
Patina Sunset...paint the sky with patina
Sept 18th : Deadline to submit 
Sept 19th: Winners announced
Oct 1st: Bead Chat Magazine Feature

In addition to a workbench full of metal-working tools (and I'm still just getting started), I have a small arsenal of items to color metals with.  
My newest color purchases!


Everything from the basic Liver of Sulfur (used to darken copper--one of my favorites) to a wide variety of color patinas that can be used on a variety of metals (such as copper, brass, and aluminum), these help me create a multitude of looks!

* * * * * *
Just for a bit of fun....  
Can you answer these questions?

1) Excluding the Liver of Sulfur Patina Gel, 
what 3 brands of liquid color patinas 
do you see here?

2) What metal coloring product comes in the silver tins?

How to play:
  • Leave a comment and how to reach you.  
  • One correct answer gets you one chance.  
  • Two correct answers gets you two chances.  You can submit both answers in one message.  I will count as two.
  • I will hold the comments for 24 hours.
  • From these entries a winner will be drawn.
  • The prize will be some assorted metal components by me.


PRIZE = These "Lime Green Lovelies" + ????

* * * * * *
Now, on to the Artisan Whimsy Challenge!   I hope some of you submitted pieces too!


This is my entry for a handmade piece:

It is a large, rectangular, hand made copper pendant, 
embossed with a flower design, 
treated with a variety of patina colors, then sealed.  

Be sure and visit the other contestants on the Artisan Whimsy site!

~Sharyl

******************
REMINDER:  I will be holding the comments for 24 hours so that we get original answers!   :-)   I can see your replies, but you won't be able to until tomorrow.  Thanks!  ~Sharyl