
So, here we meet again! The next project I worked on utilized some of the beads from "Kit and Caboodle Shop" (Gayle Dowell) and "TracyBell" I showed you in my last post. I used copper wire and a wide assortment of round gemstones and a few round glass beads to complete the work. The feeling I was going for here was loose and dangly, with many bright colors.
You'll spot Gayle's (turquoise colored) Amazonite nuggets and ceramic red donuts appearing as connectors in this first part.


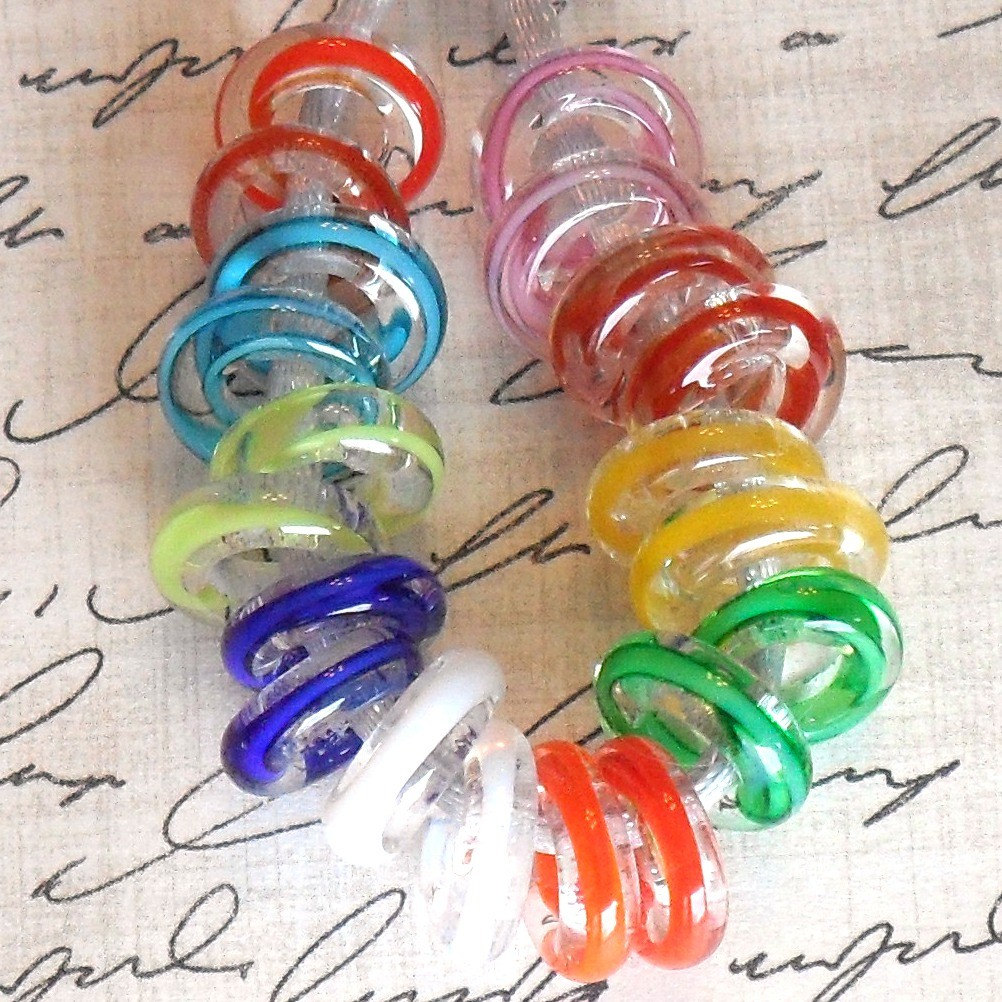
I mixed round beads of varying colors with a "Funky Rainbow Ribbon Bead" (red and yellow shades) from TracyBell between them to dangle. Rather than making a loop or scrolling a larger design with the wire at the ends of the dangling pieces, I went for a simple head-pin look by simply folding the copper wire over upon itself for a sleeker design.

The "focal dangle" (is that a new term?) is made from one TracyBell bead, plus two gemstones and one large navy speckled glass bead from my collection, simply repeating the design elements found in the necklace.

Wires between sections are 2 layers of loops I made, commonly known as "chain maille," although these are thinner than I typically see. (I like the more delicate look but hope they will hold up.)
You cannot tell it in these photos, but the loops turned out very uniform in size, just as I had hoped.

The clasp is still a simple one I made myself from copper wire, but it's a different design than I often use. The wire is doubled on the hook, giving it additional strength and smoothness. (The part it hooks into may need additional work to strengthen it up as well.)
I do enjoy making my own clasps, and since making this necklace, I've recently received some wonderful tips about learning more in this special area. I'm very anxious to try out the suggestions, so no doubt you'll be seeing a variety of clasps and wirework on these pages in the future!
 Critique Time!
So, please, let me know what you're thinking! (I'll just think the worst if you don't comment at all!)
- The comments and suggestions I've received here and through email have been extremely helpful and I'm very grateful!
- I can already tell that my lighting was not so good on these photographs. Some too light, some too dark. I tried to adjust with my software afterward, but that didn't work well either. Any suggestions on how to improve that? I'm just beginning to grasp indoor shots, but outdoor often has me flummoxed!
- If you have any topics you would like to discuss or jewelry you would like to show, please let me know! You don't have to have your pieces critiqued--just let me know your preference and I'll indicate in the message if you desire it.
- Thanks again! Anxious to hear from you!
------------------------------------------------------------------------------------------------
Image Credits:
Question mark guy: http://www.wpclipart.com/blanks/callouts/eyeball_character/.cache/bubble_eyeball_character_question.png
All other photos by Sharyl, Oct. 2011
7 comments:
Great Job, Sharyl. I love the combination of the red and blue being the dominant colors in this piece. I also like the added assymetrical color arrangement that you added as well. Did you know when you bought these beads, how you would work them in together, or does that happen as you work? I tend to buy beads I like, then work them in as I am inspired. Maybe not the best way as later I have beads I don't know what to do with, as you can see by my destash collection!
Thank you, Gayle! I'm afraid I tend to do the same as you--I buy what I like and work with them later! In my most recent order from Beadaholique though, I did make an effort to select beads I hope will coordinate with other beads and with focals purchased elsewhere, so that I can design entire pieces. I'll have to see how well they really go together when they arrive!
Thanks for the thoughtful question and comments!
Natural lighting is something that still confuses me, but if you experiment you'll hit it. Bright sun is never my friend -- an overcast day can sometimes be good, believe it or not. On bright days, I go to the other side of my house, where there isn't direct sun, to take photos.
Have you tried Picnik.com for photo manipulation? I have PhotoShop Elements but since finding Picnik it's been a dream.
If you don't want to use your tumbler on your pieces (factory lampwork, dyed stones, things like that sometimes won't survive the trip) you can hammer them with a nylon or rawhide hammer against a steel bench block. Beaducation.com has a lot of that stuff and tutorials, too.
Copper IS softer than sterling, so if you're making delicate jump rings, throw those in the tumbler for a while before using them on jewelry so they're work-hardened a bit.
My two cents which looks more like two dollars but it's just my opinion, and not the law! :-)
I love how the piece turned out the colors are right on and the design is interesting and keeps your eye moving. The only think I personally would do to this piece is patina, I am just not a fan of bright copper and I think that the beads speak for themselves and don't need the competition of the bright copper. If you get your patina really hot it will give your copper nice blues if you keep it ice cold you have a chance of getting a rosier look on the copper.
Wow, thanks Lori! I value the feedback--2 cents or 2 dollars!
First, photography: I was finding the same thing about the darker spots of the yard, but thought there might just be something wrong in my technique. Good to know you have the same experience!
Re editing: I purchased Photoshop Elements a while back but haven't loaded it on my laptop yet. I've been using HP Photosmart Essential, and it's an improvement over nothing, but not outstanding. I opened a Picnik account, but thought it was more like Picasa and just for storage, so never used it. I'll have to try that again since you like that one!
Part 2 of response to Lori--
Thanks, I was wondering about the tumbler for these pieces, especially those jump rings! I do have a jewelry anvil and hammer so that's the approach I've typically used to work-harden metal, but didn't do that with the rings, afraid they would lose their shape.
I've "wished real hard" for a tumbler for my b-day in early November and fully expect to get one! Still need to get the stainless steel shot. Then I'll be hardening wire like crazy! Thank you for sharing your knowledge in this area. It's very generous of you!
I'm sure we'll have future blog entries on this topic!
Beadbug, thanks, I value your suggestions regarding patina! I knew I would learn a "thing or six," (as my dad used to say) from asking for feedback!
I'm not very familiar with the processes for this. It seems like you can achieve certain patina effects by heat processes and others by using various chemical processes. Are you referring to using a torch?
You are no doubt very experienced working with fire with your glasswork--my only experience was catching the kitchen on fire a few years ago trying to make slice-and-bake cookies! (Those extinguishers do make a mess!)
Do you have recommendations or know of a tutorial for applying the patina? (I've been looking over several that might eliminate the need for me to phone the fire department, but there seem to be so many options! So far, a dip in bleach sounds the easiest, but maybe not the best approach?) If you (or others) have favorite methods, I'd love to hear more!
P.S. I'm sometimes "drawn to shiny things" so I do still like the bright copper. I just like both looks--and would love to learn to do this! I have a pair of earrings in progress that could greatly benefit from a patina finish. I feel an experiment coming on!
Thanks for the great suggestion, TB!
Post a Comment